
To replace one eye with another
February 21, 2017 at 1:34:45 PM GMT+2Contents
This lesson is part of a larger section on retouching eyes in Photosho. For a more detailed study of photo retouching we recommend you to read the other articles on the topic:
- Contrast enhancement in the pupil
- Darkening the edges of the iris
- Add expressiveness to the eyes
- The creation of new and adjustment of existing glare
- Lightening the whites and the orbits of the eyes
- Remove the red veins in the eyes
- Change the color of the eyes
- Increase and decrease the size of the eye
- To replace one eye with another
- Retouch of the eyelashes
- Correction of the shape of the eyebrows
- The creation of thick eyebrows
- Darkening the eyebrows
- Sharpening the eyes
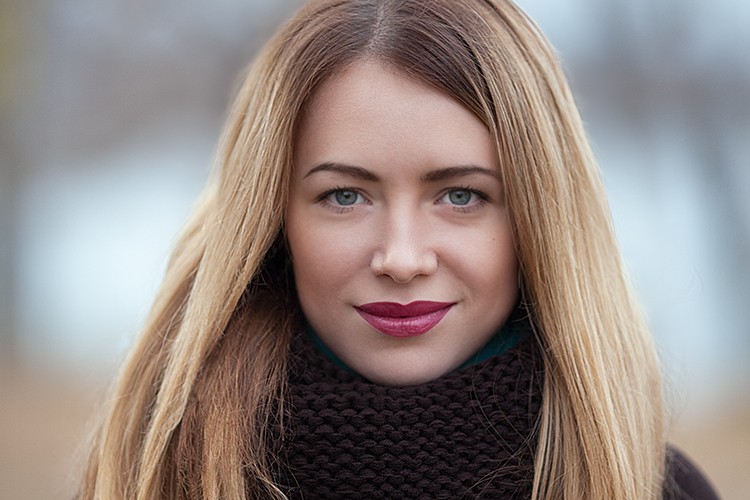
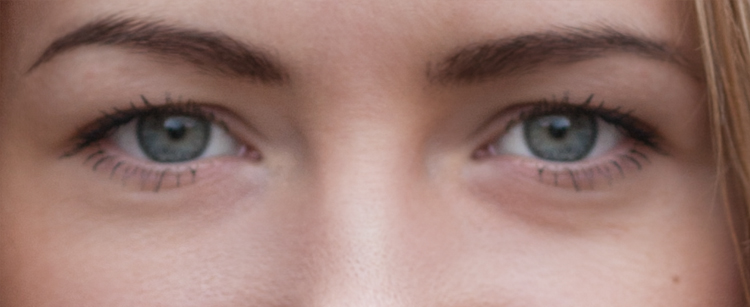
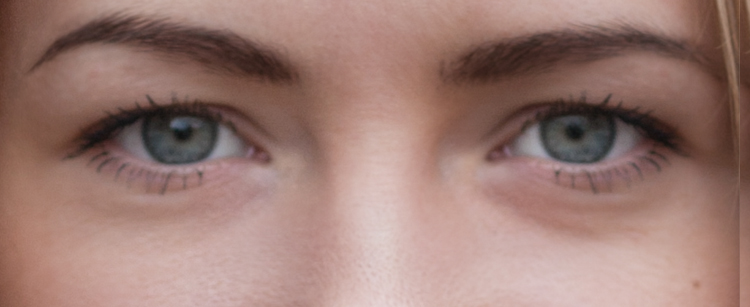
Will consider a method of replacement of the image of a "not good" eye with the copy of the image of the second eye. This procedure may be needed if one eye seems smaller or bigger than the another one, or if one of the eyes is covered by hair.

Step 1
The left eye of the model is opened wider than the right. So we use a copy of an image of the left eye (i.e. that is shown on the left) to correct the image of the right. As a result, both eyes will look the same.
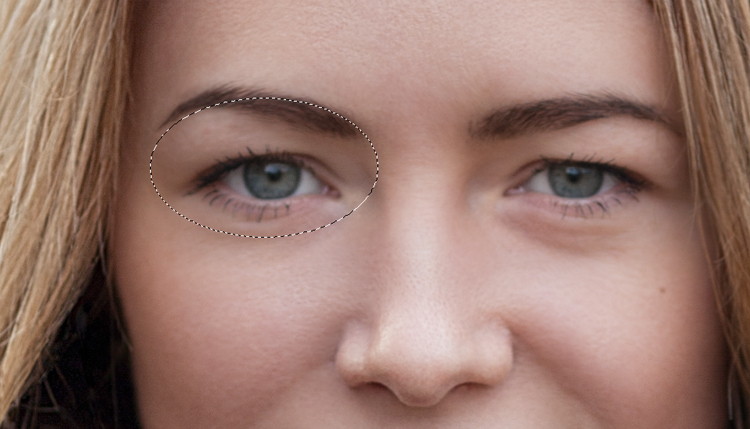
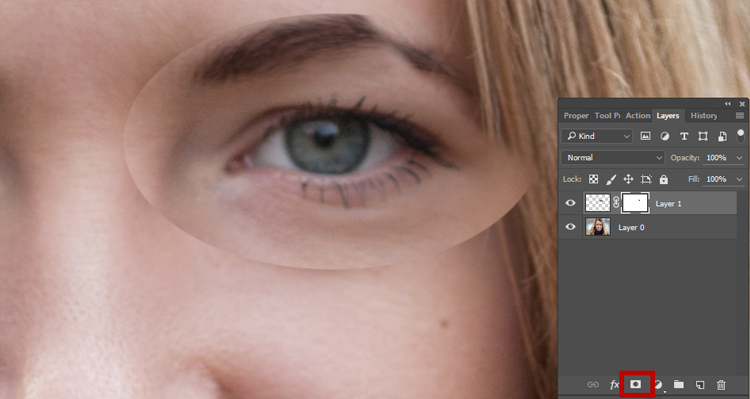
Use the Zoom tool and zoom in on the eye. Activate the Elliptical Marquee tool and select a part of the left eye. Do not worry if you grab a bit of space around the eyes — we'll fix it later.
Step 2
We need to copy the selected area to the separate layer, so press the key combination <Ctrl+J> (<Ctrl+J>). Activate the Move tool and drag the copied area, so that it is positioned over the right eye. The lightening of the right eye differs from the lightening of the left, so it can stand out in the "background". It is easy to fix. We have more serious issues than lightening: in the moment there are two left eyes on the face of our model and that looks scary.
Step 3
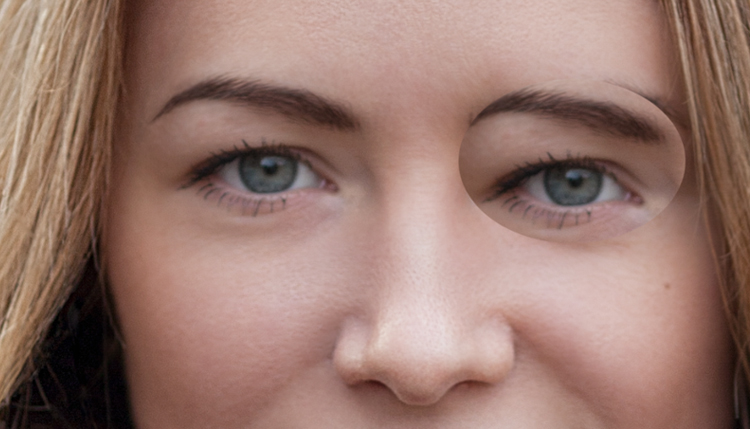
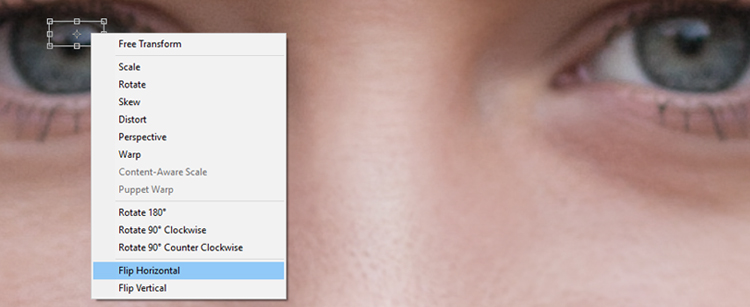
Zoom in the right eye and press the key combination <Ctrl+T> (<Ctrl+T>) to run the command Free Transform. Click the right mouse button inside the bounding box and select Flip Horizontal. As a result, the copied image of an eye will appear horizontally and will become the right eye. Do not press < Enter > (< Return >) to save the conversion yet.
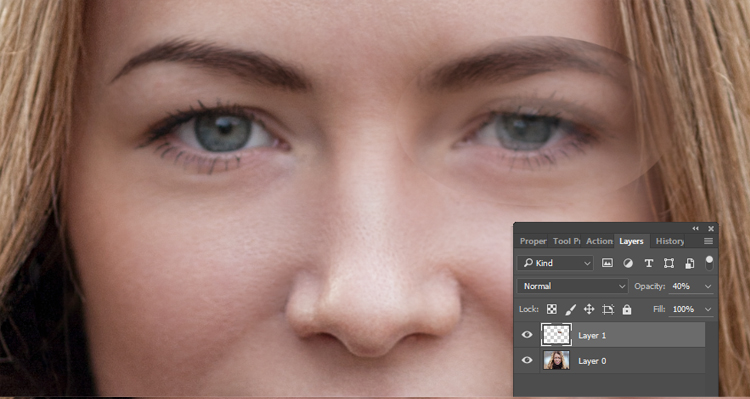
Now we need to align the "new" eye so that it is exactly above the image of the "old" eye. In the Layers panel reduce the Opacity for example up to 40%. Now using as a reference the position of the iris, align the image of the upper layer relative to the initial position of the eyes. After the layers are combined there should be no shifts when we switch the layer enable and disable (i.e. the eyes must not move neither up nor down, neither right nor left). If the images are aligned not accurately, then lower the opacity and align the eye position in the photo again. After the images are aligned, press < Enter > (< Return>) in order for the transformation come into effect.
Step 4
And now we need to remove an extra area around the eyes. First, click Add Layer Mask at the bottom of the Layers panel (the icon is highlighted in the image). Activate the Brush tool and select a large brush with soft edges at the brush palette. Set black color as the primary and draw carefully the extra eye area to save the image of only an eye.
Step 5
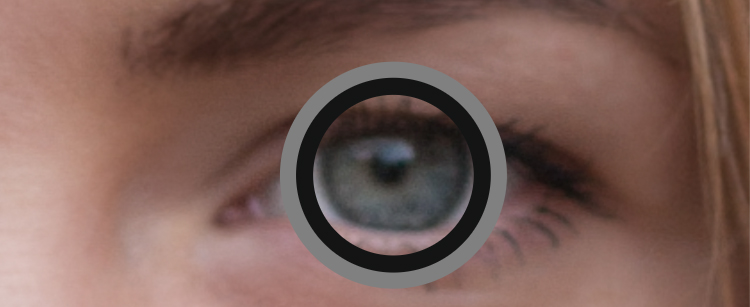
Continue to draw with the black color around the eyes using a brush with soft edges until you remove all the unnecessary area, retaining only the image of an eye (as shown in the figure below).
Step 6
It's time to hide the traces of retouching. The light reflection in the eye of the model is on the wrong side. As we turned the copied image of the eye, highlights in the two eyes created the effect of strabismus. This betrays retouching. Therefore, you need to move the reflection of the light on the other side of the pupil. First, keep all the layers of the image on a separate layer. As a result if you need the image in its current form you will always be able to get back to it. Press the key combination <Ctrl+Al +Shift+E> (<⌘+Option+Shift+E) to create a new merged layer on top of the list of other layers in the Layers panel. Select the Elliptical Marquee tool again and create a dedicated area around the light reflection on the image of the copied eye. Grab some black pixels in this selected area. Press the key combination <Ctrl+J> (<Ctrl+J>) to keep the reflection of light on a separate layer, and then use the key combination <Ctrl+T> (<Ctrl+T>) to run the command Free Transform. Using the Move tool, drag a copy of the reflection of light to the left side of the pupil, where it should be in a real image of the eye. Click the right mouse button in the bounding box and select Flip Horizontal. Flip horizontally the reflected light once again, to match the reflection that was really present in the right eye. In order to save the conversion, press < enter > (< Return >).
Step 7
In the Layers panel click on Layer 2, where the reflection in the eyes is not the same. Use the Eyedropper tool to click on the image of the pupil and to choose the primary color of the pupil (as shown below). Now just draw a still reflection in the pupil using a small brush with soft edges or use the Clone Stamp tool to copy the fragment above the pupil light reflection. You can use any of these methods, so choose the one you like best.
Step 8
Hold down < Alt > (< Option >) to use the Clone Stamp, click on the pupil to use it as the source for cloning. Then draw the previous light reflection to copy the sample pupil above this reflection. (Make sure in the options bar drop-down list the Mode is selected as Normal, and in the drop-down list the Sample is selected as All Layers). As a final action you can copy the image of one or two lashes on Layer 2 to make the lashes and the eyes themselves bit different.
Video tutorial