
Remove or smooth wrinkles
March 22, 2017 at 8:25:17 PM GMT+2Contents
This lesson is part of a larger section on retouching skin in Photoshop. For a more detailed study of photo retouching (unless you don't want to use online photo editing service) we recommend you to read the other articles on the topic:
- Removal of blemishes and skin imperfections
- Quick skin smoothing
- Skin smoothing preserving its texture
- Skin enhancing and adding texture
- Smoothing the skin using the color channels
- Remove or reduce wrinkles
- Removing flash glare
- Skin tone harmonization
- Makeup photo editing
- Creating a porcelain skin effect
- Sharpening of portrait photos
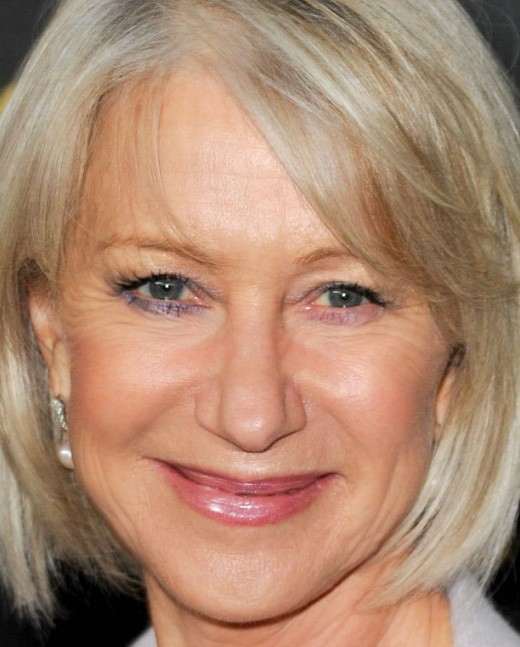
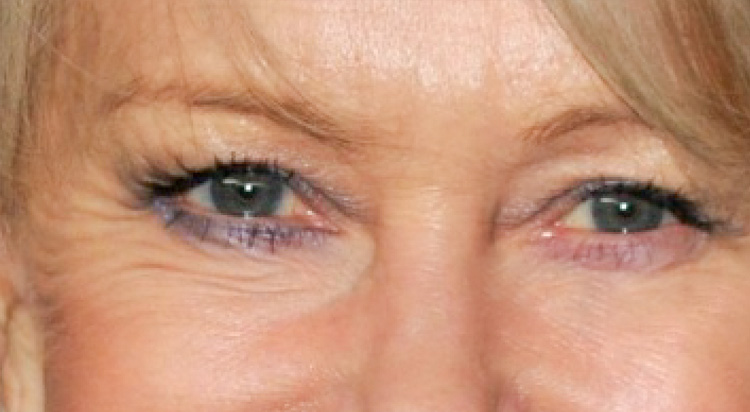
The older the individual is, the deeper and longer are its wrinkles. They can be completely removed, but the person's face will look weird. Instead, it is better to reduce the wrinkles by brightening the darkest parts of the image. When retouching wrinkles, it is important to remember that you need to rejuvenate a person for ten years, not for forty.

Step 1
Wrinkles can be reduced by just two simple operations.
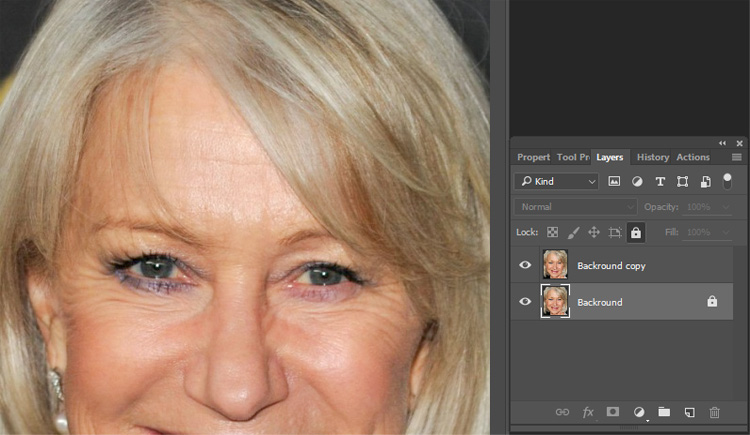
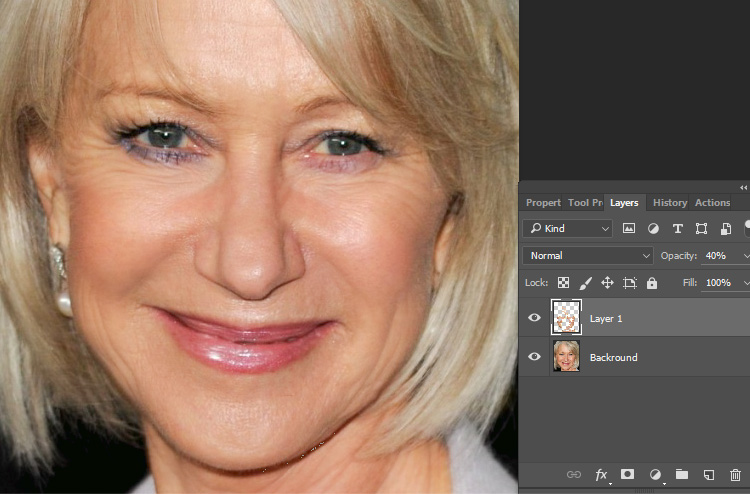
In the first phase, we will completely remove all the wrinkles, and in the second - will partially put them back to the picture, so it looks more natural. Click on the icon Create a New Layer, which is available at the bottom of the Layers panel to create a new clean layer. We will complete all the conversion in it.
Step 2
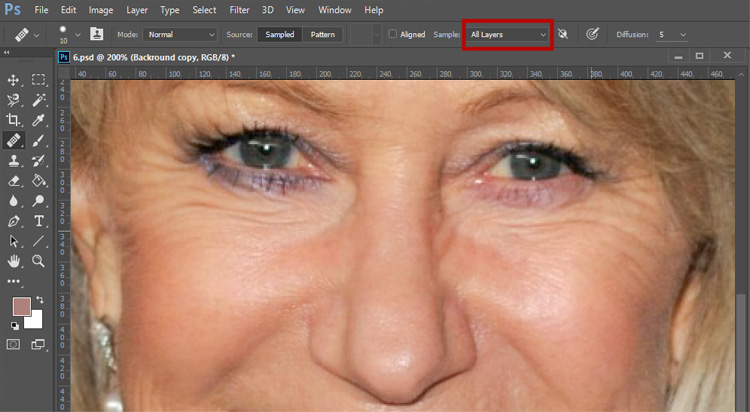
Zoom in on the needed part of the image and activate the Healing Brush tool using the key combination < Shift +J >. Select a brush of small size in the options bar for this tool and in the Sample drop-down list, select All Layers. This will allow you to work on the top clean layer, but you need to choose the samples of pixels for shading using the image background. Hold down < Alt > (< Option >), select the pixels for retouching in a close proximity to the fragment. Make sure that pixels are selected in the fragment of the skin with the texture that is similar to the edited fragment texture.
Step 3
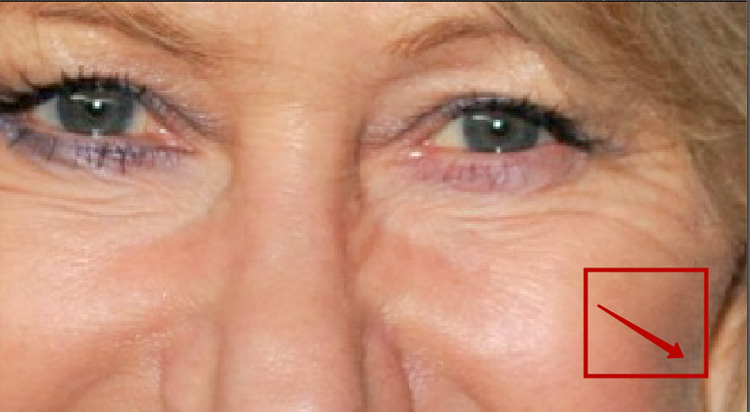
Drag the pointer over the fragment, which will be retouched. In the picture for this step, we held the brush from left to right under the model’s right eye, highlighting this area in the figure. There is good news: it is not necessary to completely remove all the wrinkles at this step, as we are going to recover some of them in the image later. Therefore, if you cannot remove some of the wrinkles completely, don't worry. Soon we will restore the image of a weakened wrinkles version, which hides all the shortcomings, preserved at this stage.
Step 4
Most likely, remove wrinkles with one stroke of the brush tool will not succeed. So, you will have to spend more time for this. We increase the scale of the skin imperfection image and with a few longitudinal strokes conceal the wrinkles. No matter how many strokes that might take, remove wrinkles as carefully as possible.

Step 5
Move to the model’s left eye and follow the same steps. Hold down < Alt > (< Option >), select the source pixels for retouching and draw over the lines that you want to delete.
Sketch the wrinkles under the left eye with the horizontal strokes.
Continue to remove lines out of the face. If the wrinkle is large, then you need to perform a few strokes of a brush. To make the results look more natural, you need to repeatedly change the source of pixels for shading.
Step 6
In the last step, to make the image look more realistic, you need to reduce the opacity of the top layer, on which we remove wrinkles with the Healing Brush tool. In this case, on the Layers panel, we reduced the value of the Opacity parameter to 40%. See how naturally looks the woman's face now. All the wrinkles are much lighter and thus look less deep. The woman seems younger than she is.
In each case, the opacity of the edited layer is different. It all depends on the age of the person in the picture, the number and depth of wrinkles on its face. In some cases, when retouching portraits of young people, you can leave the opacity of the upper layer to 80%.But it all depends on the person and features of its skin (the quantity and depth of wrinkles, etc.).
Step 7
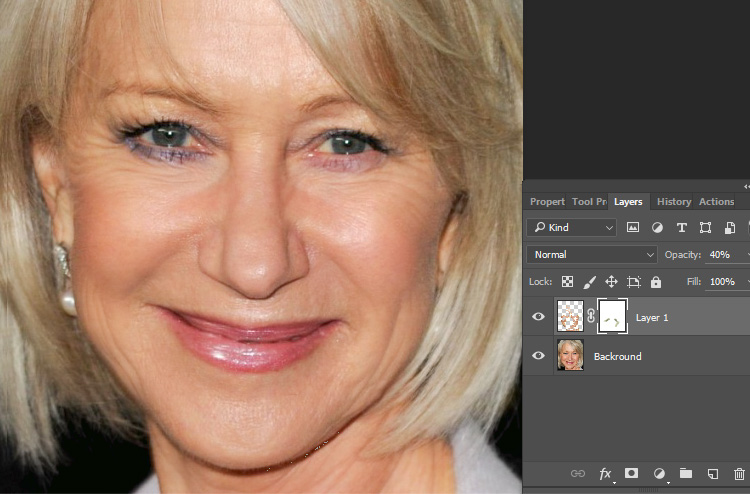
If you need to more clearly express the large facial folds on the left and right of the mouth of a woman, click on the Add Layer Mask icon, which is available at the bottom of the Layers panel.
Using the Brush tool with opacity of 10-20% paint these lines with the black color in the mask.
Video tutorial