
Skin Smoothing and Blemishes Removing in Photoshop
August 3, 2018 at 2:02:37 PM GMT+3Contents
This lesson is part of a larger section on retouching skin in Photoshop. For a more detailed study of photo retouching we recommend you to read the other articles on the topic:
- Skin Smoothing
- Remove or reduce wrinkles
- Removing flash glare
- Skin tone harmonization
- Makeup photo editing
- Creating a porcelain skin effect
- Sharpening of portrait photos
Remove Skin Blemishes
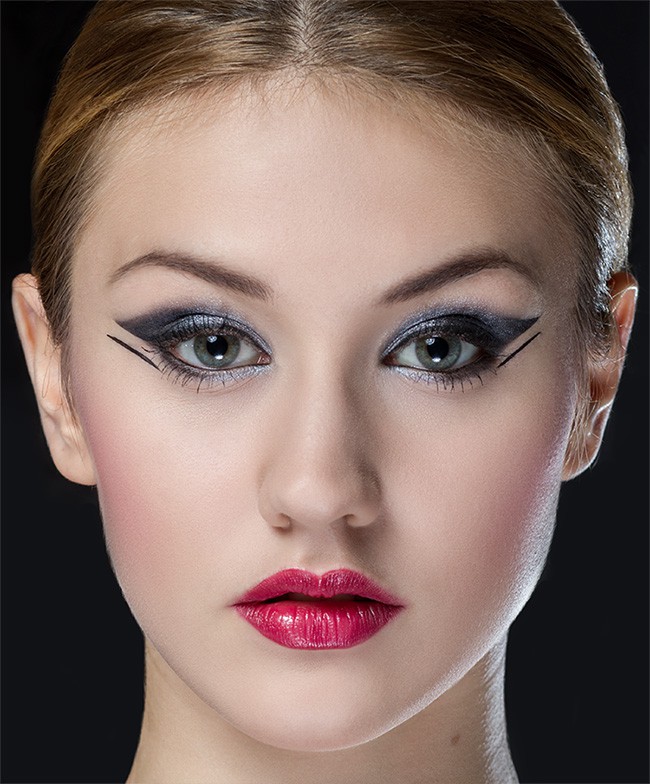
Always start to retouch skin with removing blemishes. Often, for the family photos in the photo album this retouching is more than enough and there is no need to further edit the photo. But even when photo needs further processing, all the same, the retouching should start with removal of skin imperfections and blemishes.
Step 1 - Healing Brush
For editing photos, where the skin imperfection is small and do not overlap with edges of other objects – you should use the Healing Brush, which you can find in the same cell with the Spot Healing Brush. If the skin imperfection you want to remove is located on the border of another element (for example: lips, teeth, eyes, etc.), you should use the Clone Stamp tool. It cleanly removes all the blemishes.
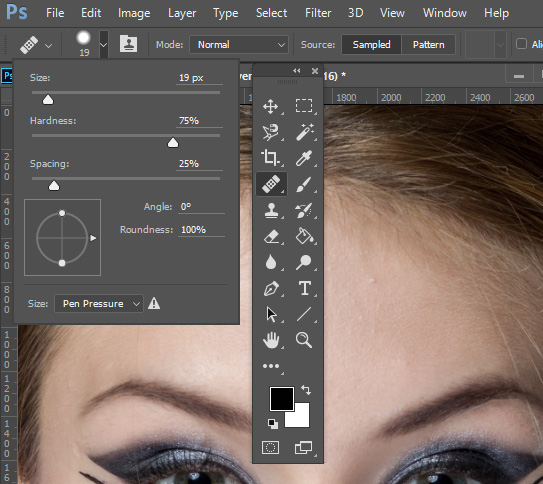
Choose Healing Brush and set the Hardness to 75%, in the Samples drop-down list select All Layers (so that you can take pixels’ sample out of the background layer).
Step 2 - Clean area
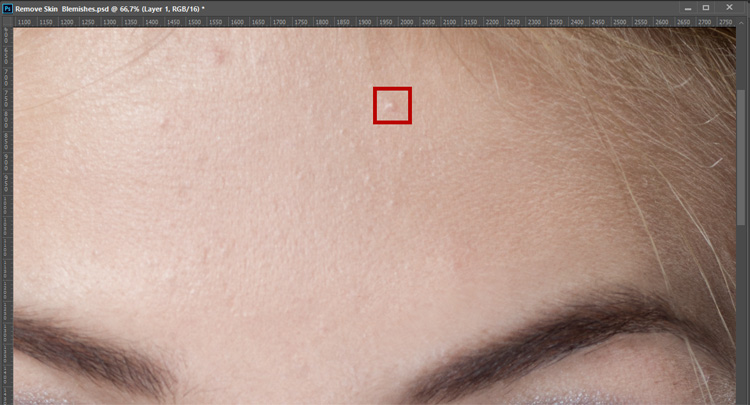
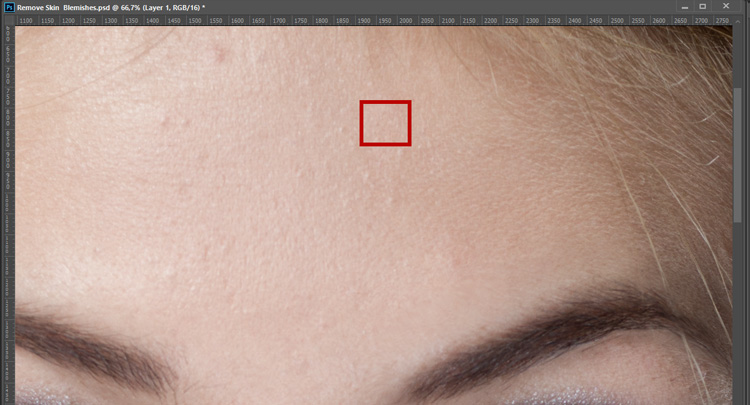
Zoom in and create a new layer by clicking on the icon Create a New Layer on the Layers panel. Hold down < Alt > (< Option >), click on a clean area of skin directly next to the blemish.
A tip: choosing the pixels on the forehead, which are used as a sample, it is better to take out ones on the left or right of the blemish, not under it or over it.
Step 3 - One short click
Move the pointer directly on the blemish and click the mouse. Do not draw it, just make one short click. That's it — the problem is solved. This is the best method to remove small sized blemishes: select the "perfect" pixels near the skin imperfection, point to the blemish and click. If the skin imperfections are located next to each other, you do not need to choose a new piece of pure pixels for treating each of them. When you start to edit another part of the face it is necessary to use new pixels’ samples so that the retouching looks as natural as possible.
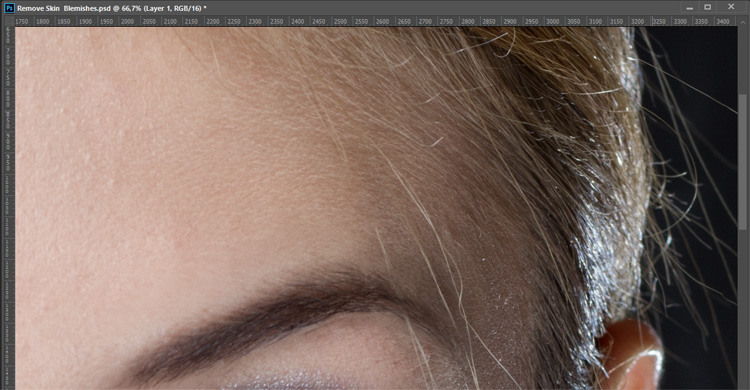
Step 4 - The largest of skin imperfections removing
Let’s start to edit another part. The sequence of actions would be the same. Choose pixels to replace the fragment, hold down < Alt > (< Option >), and then click the left mouse button, hovering the cursor directly on the blemish. In this step it is better to remove only the largest of skin imperfections. All the minor blemishes will be removed in next steps, when we turn to the techniques of smoothing the skin in the photo. To achieve a similar result, only the actions described in the previous steps were performed: selection of pixels to replace the skin imperfection and click with the left mouse button on them.
Video tutorial - Remove Skin Blemishes
Quick skin smoothing
The process of smoothing skin preserving its texture is quite difficult and time-consuming. Therefore, when retouching skin, many people use blurring instrument that creates just a horrible effect of a plastic skin. We propose a compromise solution, which is perfect for beginners. Smoothing the skin with a blur, and then restore its structure.
Step 1 - Remove all the skin imperfections
Just want to warn you that you should not use this method when retouching beauty photos and other photos which you will show to the professional retouchers.
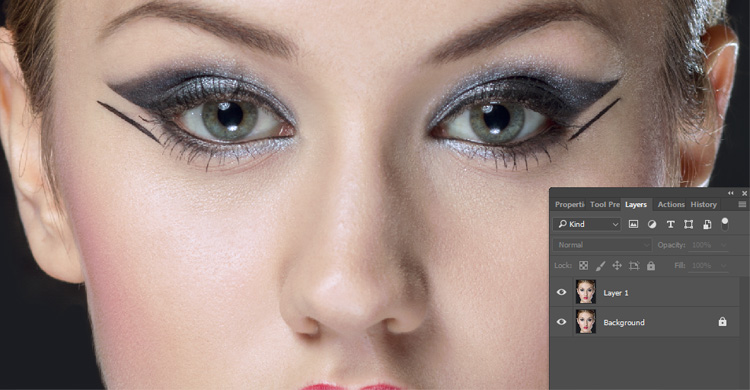
Before smoothing the skin, it is necessary to remove all the skin imperfections (the first part of this tutorial). Once it is done, use the key combination < Ctrl + J > ( < ⌘ + J >) to duplicate the background layer image, as shown in the figure.
Step 2 - Gaussian Blur
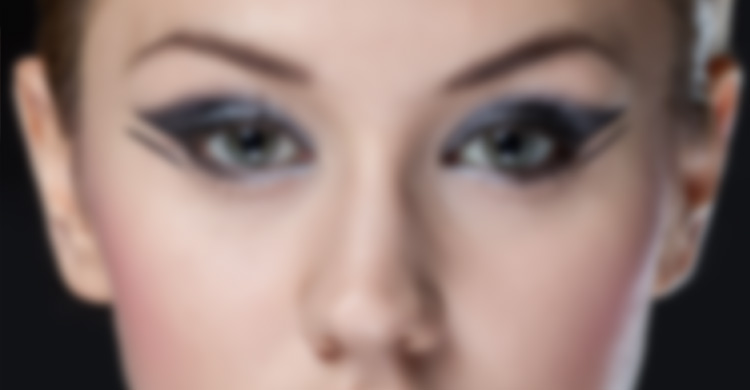
Run the command Filter -> Blur -> Gaussian Blur. In the dialog box, shown in the figure, set the Radius parameter to the value of 20 pixels. This will allow you to blur the entire image, as shown in the figure. Click OK to close the filter dialog box.
Step 3 - Weaken the effect
Reduce the opacity of the blurred layer to 50% to weaken the effect. Somebody would have stopped on this step, but as for us, the image still looks too blurry. However, we leave the opacity of the layer equal to exactly 50%. It allows you to visually facilitate the further editing of the image.
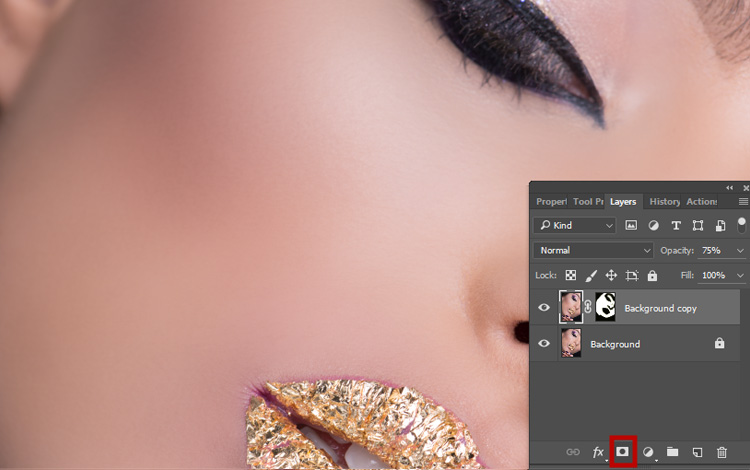
Step 4 - Blurring
Hold down < Alt > (Option), click the icon Add Layer Mask, which is available at the bottom of the Layers panel. This will hide the blurry layer behind the black mask, and the original image without blurring the Background layer will appear again. Set white as the dominant color on the toolbar, and select the Brush tool by clicking on the Options panel in the palette. Use a brush with soft edges (at least to start). Now start to sketch the skin fragments. It is very important not to sketch those pieces that should be sharp (eyes, hair, etc.). To sketch the appropriate skin fragments, you will need to change the brush size while drawing.
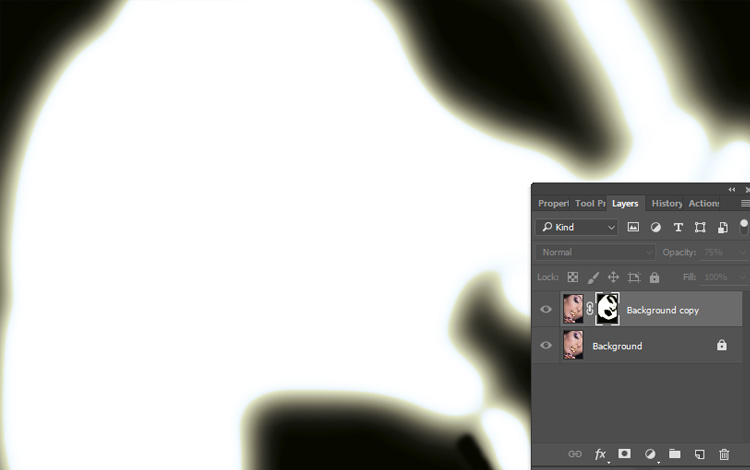
Step 5 - Missed fragments
To quickly assess which parts of the skin you have already sketched, and which you have missed, click on the mask thumbnail in the Layers panel, hold down < Alt > (< Option >). As a result, the layer mask is full screen displayed. Now you can see which parts were skipped.

Step 6 - Draw all the missing fragments
Now draw all the missing fragments with a brush. Only those fragments, that should not be diluted (they should remain crisp) should be left black on the mask. To display a color image on the screen and continue its editing, click again on the mask thumbnail in the Layers panel, hold down <Alt> (<Option>).
Step 7 - Recover the texture of the skin
Now it's time to partially recover the texture of the skin. Reduce the value of the Opacity parameter up to 35%. If the texture of the skin allows, you can reduce this value a little bit more, (to assess the changes that we made you need to sequentially disable and enable the visibility of the top layer for several times. You can do this by clicking on the eye icon which is located to the left of the layer name). Most often when retouching portrait photos, we have to choose the opacity value in the range of 25-35%. The main thing is to remember that the lower the opacity of the top layer, the stronger will the texture of the skin manifest itself in the original image.
Step 8 - Show more texture
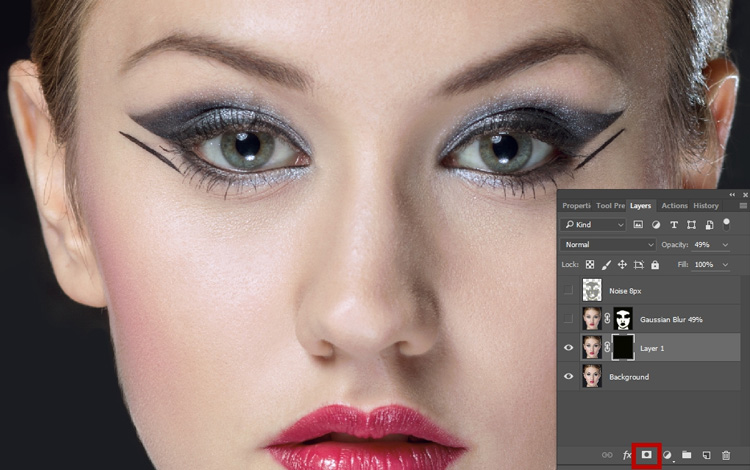
To show more of the original texture of the skin hold down the < Ctrl > (< ⌘ >), click the layer mask to load it as a selection region. Then click New Layer, which is available at the bottom of the Layers panel. At the Edit menu, select Fill and select 50% Gray in the drop-down list of Use, to fill the selection with the gray color. Click the OK button, but don't cancel the created the selection.

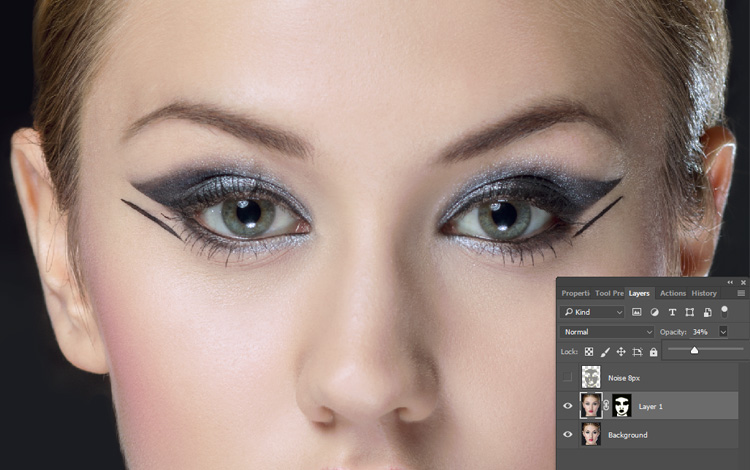
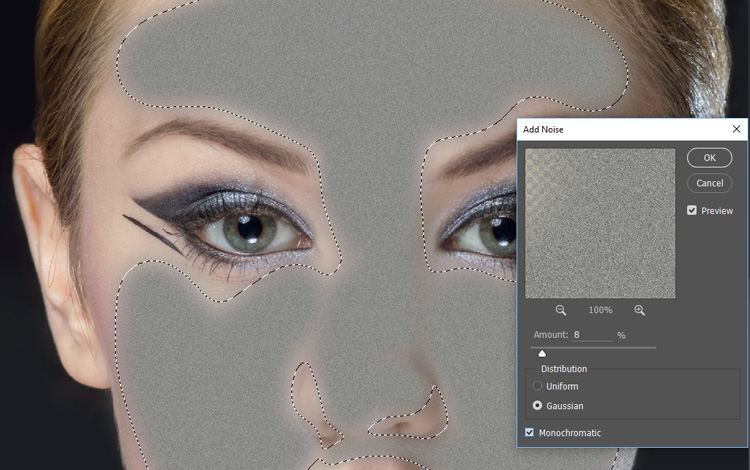
Step 9 - Add Noise
Run the Filter -> Noise -> Add Noise command. In the filter dialog box enter a value in the range of 2-10% for the parameter Amount, in the Distribution parameter group, select Gaussian and check Monochromatic. Click on the OK button. Deselect by using keyboard shortcuts <Ctrl + D> (<⌘ + D >) and change overlay mode of the layer to Soft Light to create a subtle texture, or to Overlay to create a more expressive texture. When more than two layers were created for the image, in order to compare the original and edited images you can click on the visibility icon of the background layer (icon eye), hold down < Alt > (< Option >). This action allows you to disable the visibility of all layers except the background. To re-enable visibility, click again on the visibility icon of the background layer, hold down < Alt> (< Option >).
Video tutorial - Quick skin smoothing
Skin smoothing with preserving its texture
This technique allows to smooth skin of the model in the pictures fast and beautifully, without too much blurring. And this technique works quite effectively due to several actions that help to preserve the natural skin texture. This method was first described by Brazilian Retoucher "byRo".

Step 1 - Preliminary estimates
Use the key combination < Ctrl + J > ( ⌘ + J) to copy the background layer of an image.
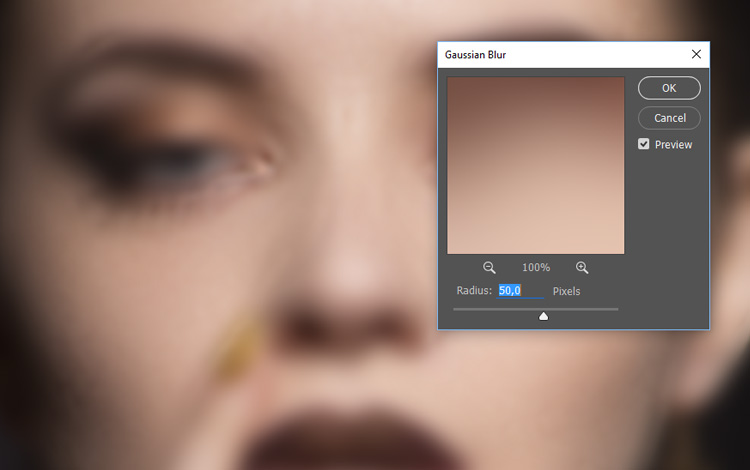
In the Filter -> Blur menu, select Gaussian Blur filter. Don't worry, this filter will be used only for preliminary estimates. In the Gaussian Blur filter dialog box, drag the slider to get the blur effect of skin when you do not see skin texture, but facial features remain visible. Note the value of the filter slider, we have it 50. Now click on the Cancel button to close the filter dialog box without applying the selected settings.
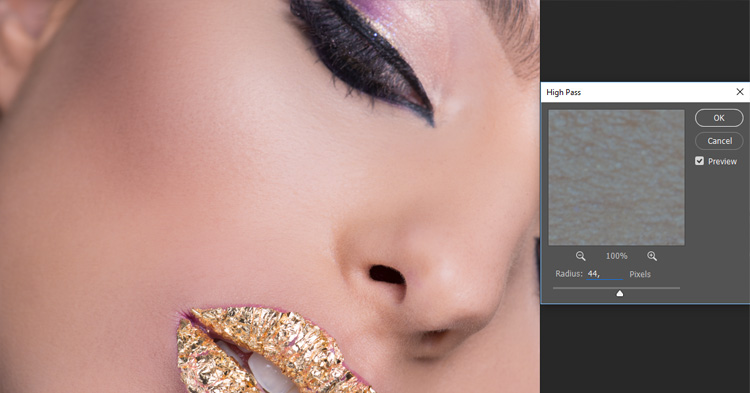
Step 2 - High Pass
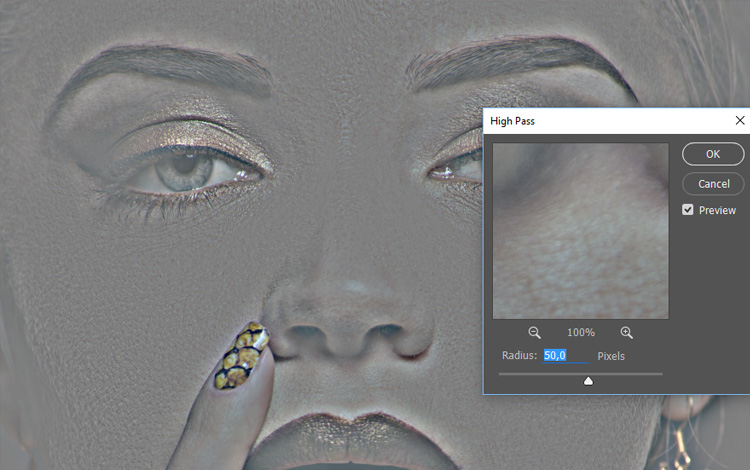
In the Filter -> Other menu, select High Pass filter. Shown in the figure, the dialog box opens. For a Radius parameter of this filter, enter the value obtained in the Gaussian Blur filter dialog box (we had 50). Click on the OK button. At this stage, the layer texture will be very, very clear, but we will correct the situation in a moment.
Step 3 - Blur the resulting texture
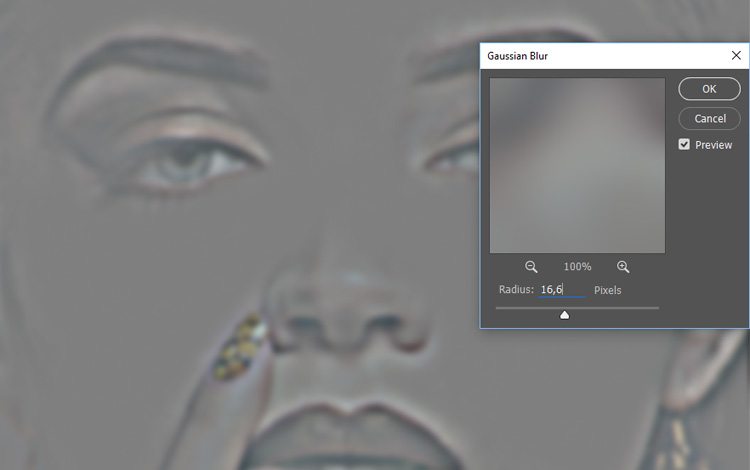
Once again, open the dialog box for the Gaussian Blur filter to blur the resulting texture. In the Gaussian Blur filter dialog box you need to enter a value equal to 1/3 of the value that is entered in the dialog box of the High Pass filter. In this case, 1/3 of 50 is approximately equal to 16.6. Click OK.
Step 4 - Invertenig
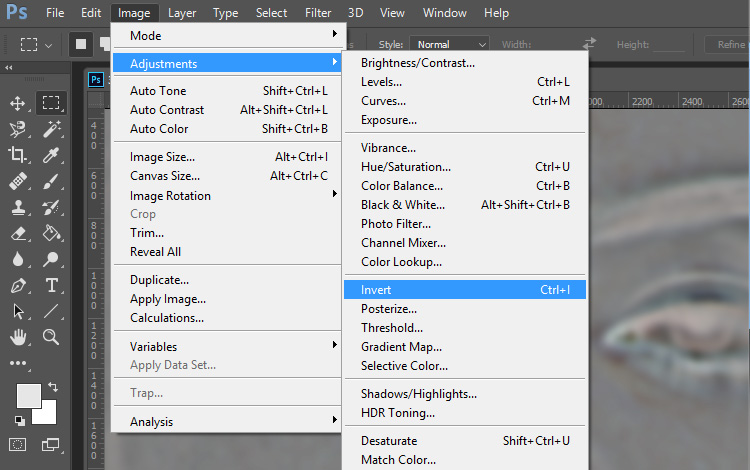
Now the layer with the High Pass filter applied on it, needs to be inverted using the command Image -> Adjustments ->lnvert or with the keys combination < Ctrl + I > (with< Ctrl + I >).
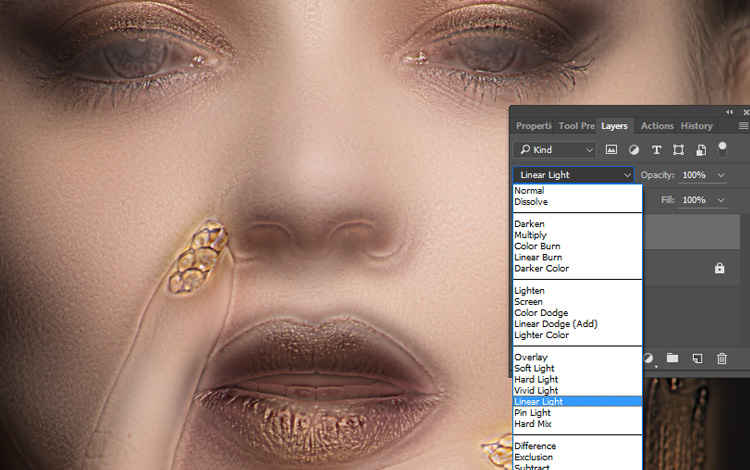
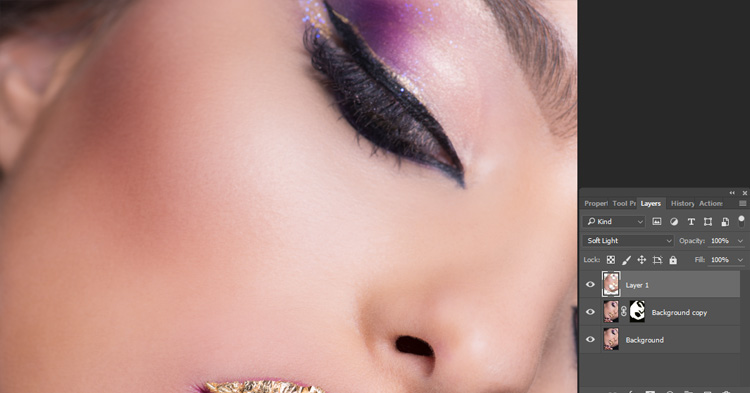
Step 5 - Change the blending mode
Change the blending mode of the top layer to Linear Light on the Layers panel, as shown in the figure. It turned out a nightmare, but we continue to retouch :)
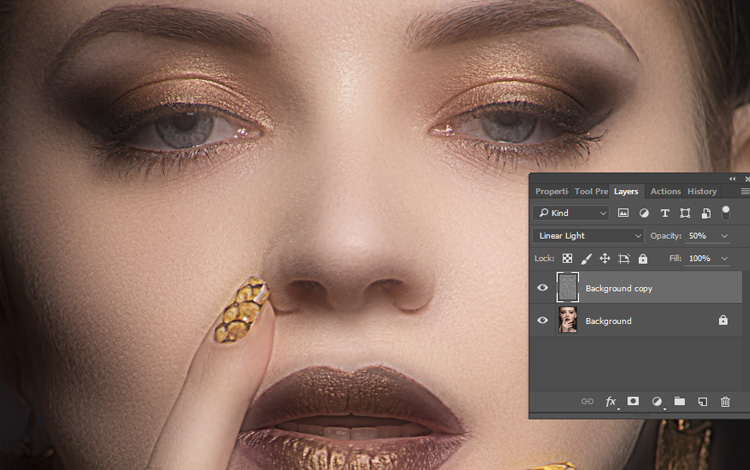
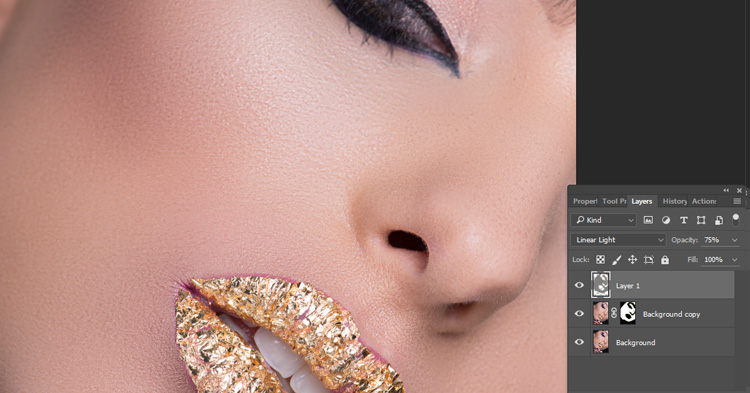
Step 6 - The image appearance is much better now
Will reduce the top layer Opacity value to 50%. The image appearance is much better now. But the quality of all areas with sharp edges still remains unsatisfactory. And we must fix that.
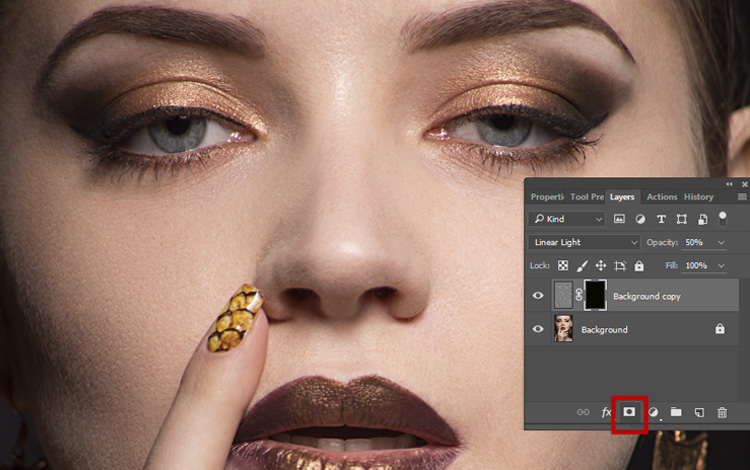
Step 7 - Hide blurried layer
Hold down < Alt > (Option) and click on Add Layer Mask on the Layers panel. As a result, a black mask that completely hides the created effect of the High Pass filter will be created on a new layer. Since the mask is filled with black, blurred layer is hidden, and you will re-open the original image.
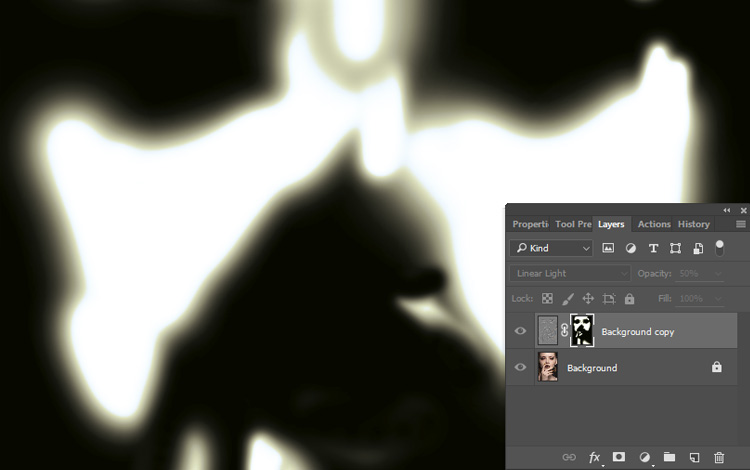
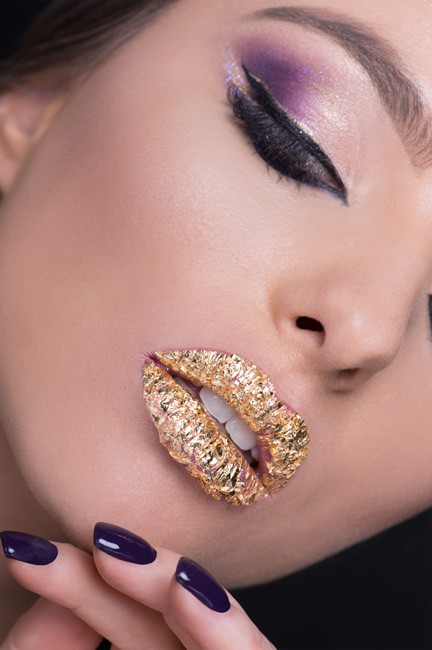
Step 8 - Skin looks smooth and it has a great texture
Press <D> to select white as the dominant color. Activate the Brush tool and select a medium size brush with soft edges in the brush palette options pane. Now paint skin fragments. Do not draw those pieces that should be sharp (eyes, hair, nostrils, lips, etc.). Also, do not draw along the oval of the model’s face, since the details on the edges of all the image elements should be sharp.
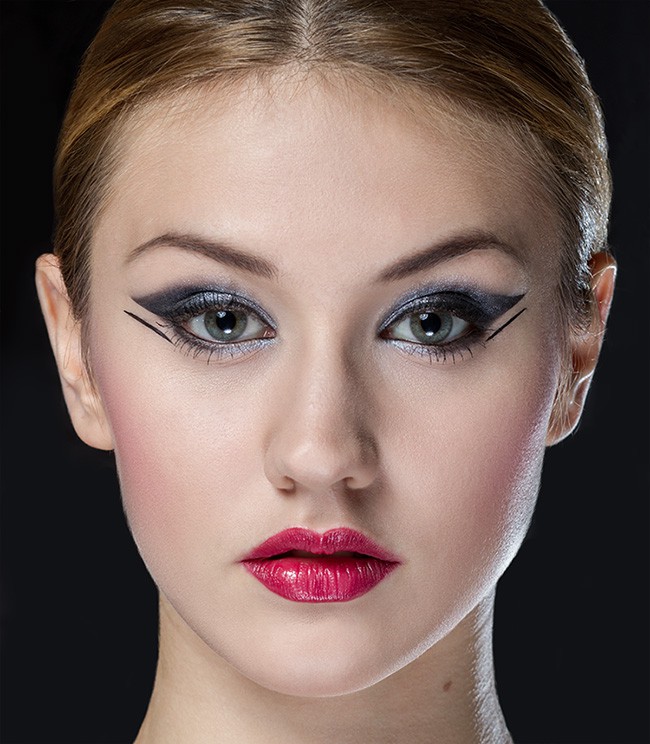
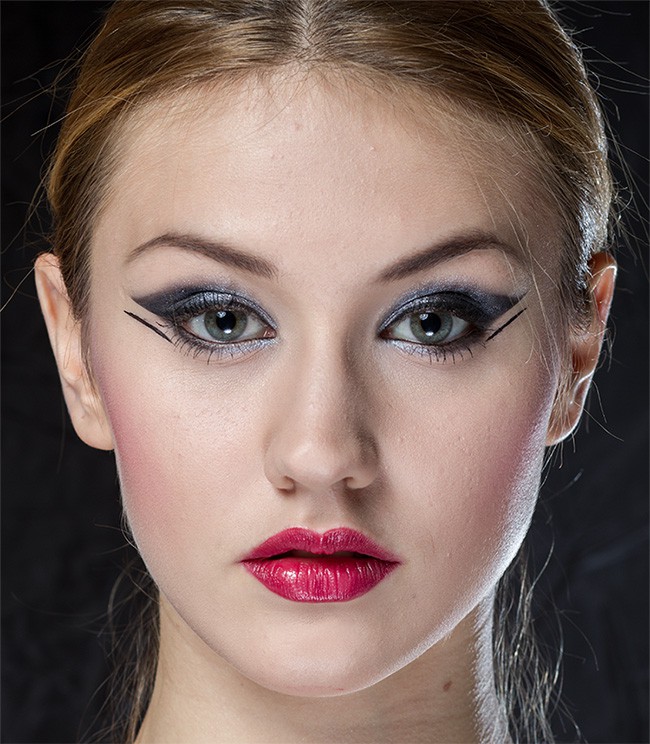
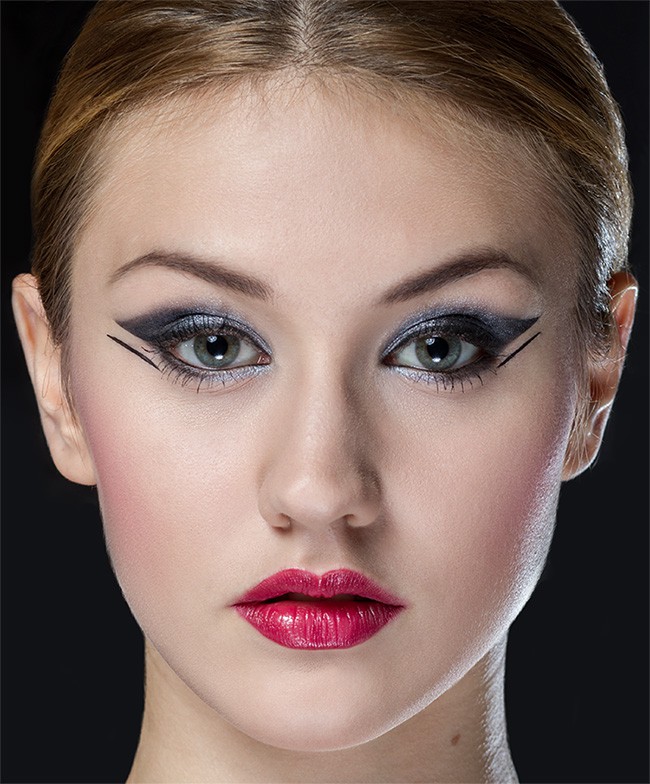
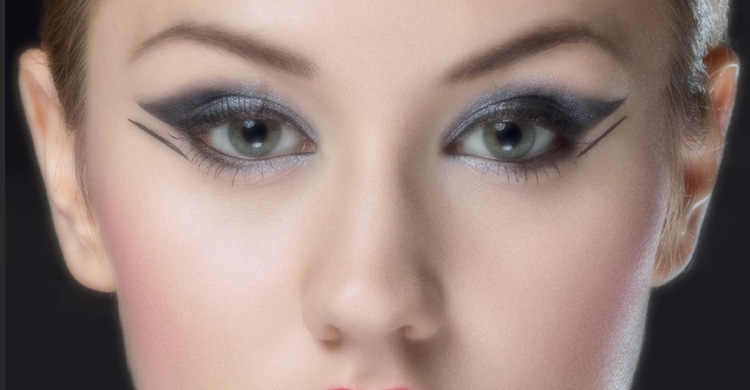
Before continue to retouch, make sure that you have not missed a single fragment that was required to blur. To do this, hold down < Alt > (Option) and click on the mask thumbnail, which is available to the right of the layer thumbnail. This will display the mask image itself. Now Looking at it, draw all the pieces that are missed. Now, to get back to work on the image, click again on the mask thumbnail in that layer, hold down < Alt > (< Option >). Look at the original and the edited images given on the next page. Please note that the skin looks smooth and it has a great texture on the final version of the image.
Video tutorial
Smooth skin and add texture to it
In this technique we use blurring of the image, it is applied to a very small extent and do not spoils the overall image. In the retouching process we use the Surface Blur filter, but this should not scare you. We will make every effort to add more texture to the image.

Step 1 - Remove all the skin imperfections
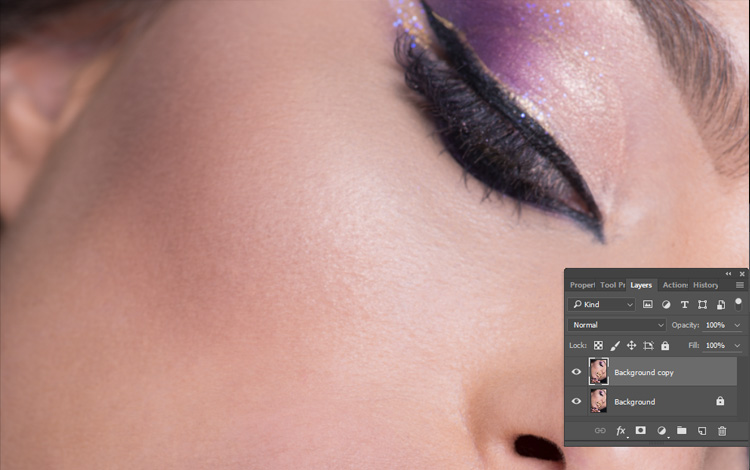
Before you proceed to smooth the skin, you need to remove all the skin imperfections (the first part of this turorial). Once this is done, press the key combination < Ctrl + J > (<Ctrl + J >) to copy the image background layer.
Step 2 - Blur Surface
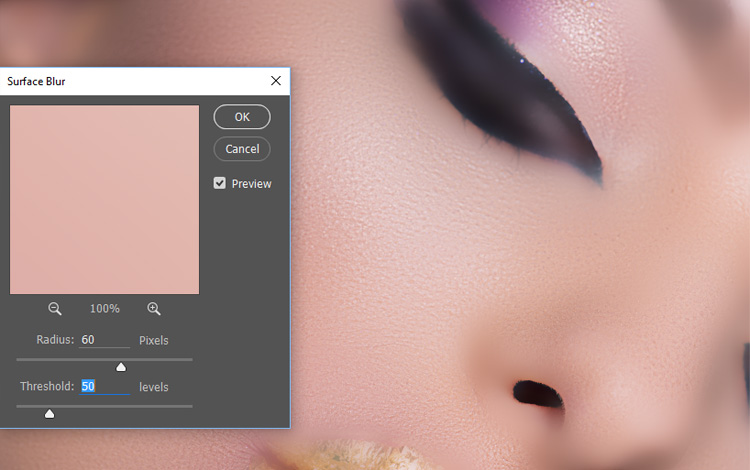
In the Filter -> Blur menu select Surface Blur filter. This filter works much more efficiently compared with the Gaussian Blur filter. It preserves sharp edges of objects much better than the Gaussian Blur filter, which blurs everything in its path. In the dialog box, set the Radius slider to the level of 60 pixels approximately. The Threshold slider is responsible for the tones of the image that will be blurred. The main rule here is to choose a value for this parameter which is higher than the value of the slider Radius. (In this case, we chose a value of 50. Practice shows that you need to choose a value of 5-10 units less than the value of the Radius parameter for this option). At this step, the skin of the model looks quite unattractive. However, click on the OK button.
Step 3 - Save fragments that must remain clear
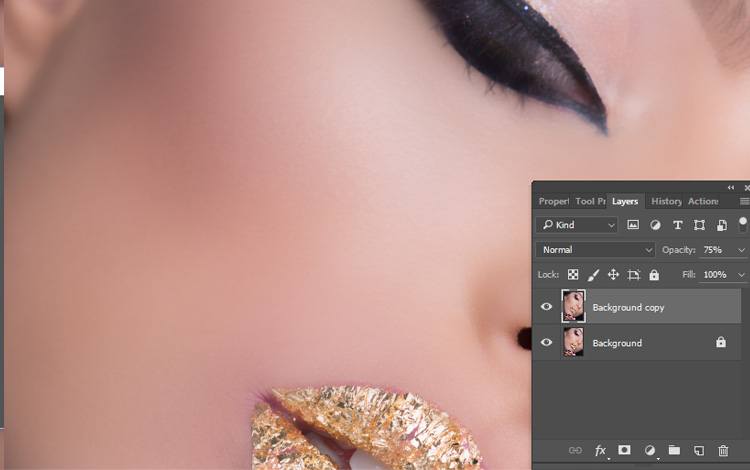
Reduce the value of the Opacity parameter to 50-75% on the Layers panel. The skin of the model looks much better now, but the result of the Surface Blur filter is blurring of the whole image, and we need to blur only the model’s face skin. Therefore, all the fragments that must remain clear, you will need to hide with a black mask.
Step 4 - Blur skin only
In the Layers panel click on the Add Layer Mask icon, hold down < Alt> (Option). As a result, a black mask will be created in the new layer, a thumbnail of which is shown in the figure. Since the mask is filled with black, the blurred layer is hidden, and you will re-open the original not blurred image of the background layer. The point is to blur only a section, i.e. the skin, leaving all other parts (such as eyes, hair, clothes, jewelry, etc.) clear. Press < D > to specify white as the dominant color and activate the Brush tool. Now paint all the pieces of the skin image you need to smooth.
Step 5 - Missed single portion
Before you continue, make sure that you have not missed any single portion you want to blur on the face. To do this, hold down < Alt > (< Option >) and click the mask thumbnail, which is available to the right of the layer thumbnail. The screen will display the image mask itself. Look at it and paint all the pieces that are missed. When all the fragments are painted, hold down <Alt> (Option) and click on the mask thumbnail.
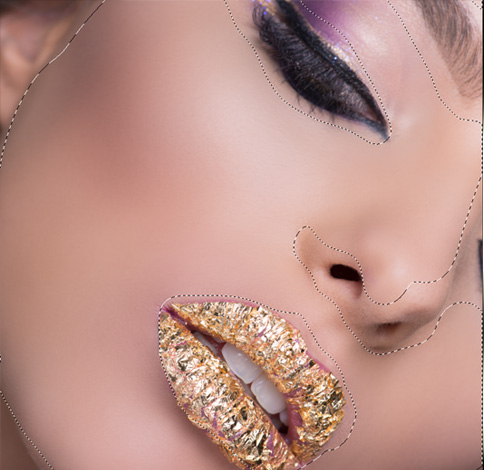
Step 6 - Load the mask as a selection
You need to load the mask as a selection for the opened color image. Hold down < Ctrl > (<⌘ >) and click on the mask thumbnail. The allocated region, based on the mask will appear on the screen. Remember that only those portions of the skin that you want to smooth (eyes, nostrils, lips and other parts with sharp edges will not be selected) will be highlighted in the image.
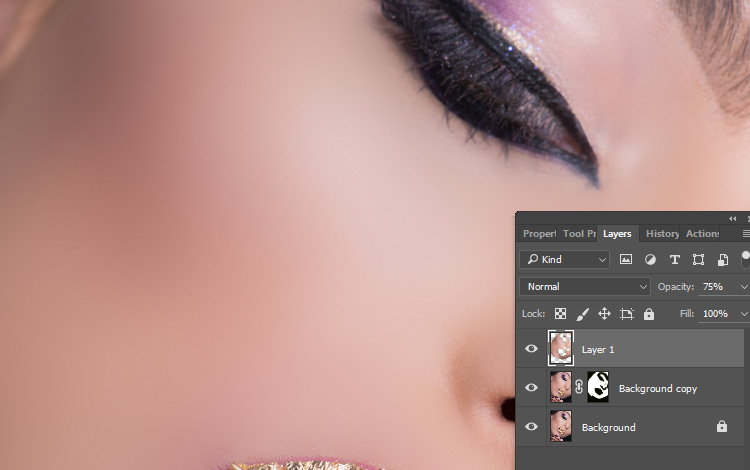
Step 7 - Copy the selected fragments
Do not cancel the selection in the Layers panel and click on the Background layer. Use the key combination < Ctrl + J > (⌘ + J) to copy the selected fragments of the background layer to another layer (see the Layers panel in the illustration, where the retouched skin fragments are copied out of the image background layer to a separate layer).
Step 8 - Perfectly apply the texture
To perfectly apply the texture layer over the image, select the Linear Light or Soft Light (if the Linear is too hard for your photos) blending mode for the top layer with a gray texture in the Layers panel. After this, almost the entire structure of the skin, which was almost completely removed from the image after the application of the Surface Blur filter, will recover.
Step 9 - Show the texture
Make the newly created layer with the copied skin fragments upper in the Layers panel by dragging its thumbnail above all other layers. To return the skin texture to the image select High Pass filter in the Filter -> Other menu. The filter dialog box opens, which is shown in the figure. Drag the Radius slider to the far left. The image will become very flat, but do not rush to click on the OK button. Slowly drag the Radius slider to the right until the image show the texture of the skin. Click on the OK button.
Step 10 - Show 100% of texture
The full recovery effect of the texture shows itself in the opacity of the top layer equal to 100%.
The lower the value of this parameter is, the smoother the skin looks and less skin texture is noticeable.
In this case, we slightly reduced the value of this parameter, because the texture was visible too clearly. In general, the choice of values of the Opacity parameter in each case will depend on the specifics of a person's skin in the photo.
Video tutorial
This is another simple and fast method of retouching, which is suitable for the beginners. This method allows to preserve the natural skin texture. The advantage of this method is the possibility of smoothing the skin using the Surface Blur filter.
Smoothing skin using color channels
Step 1 - Remove Skin Blemishes
First of all, you need to remove the skin imperfections (the first part of this tutorial) in the image using the Healing Brush tool.
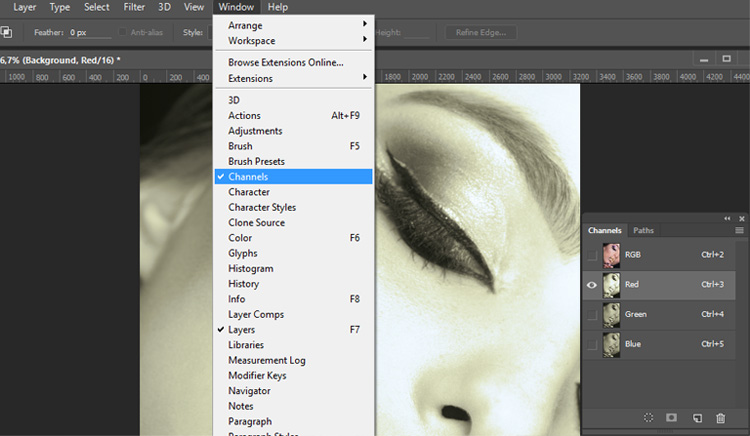
Open the Channels panel and select the red color channel. (Select the corresponding item in the Window menu if the panel is not open yet in the working window of the program.)
For the portrait photos there is less texture in the red color channel.
Step 2 - Red chanel blur
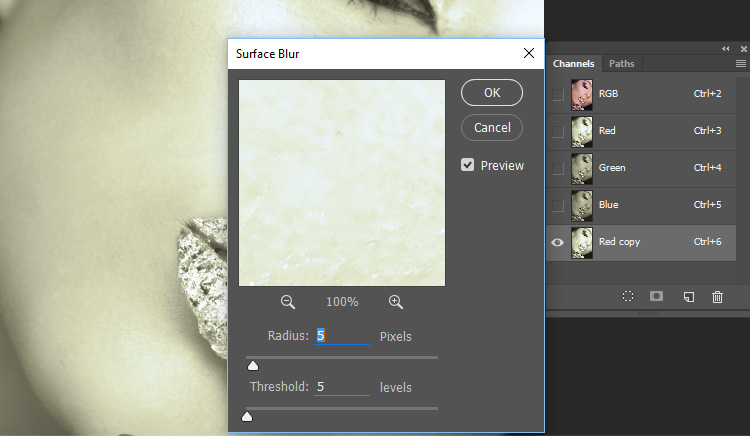
Copy the red channel by dragging it to the bottom of the Channels panel over the Create New Channel icon. (This icon looks exactly like the Create a New Layer icon on the Layers panel). Run the command Filter -> Blur -> Surface Blur. Enter a value of 5 pixels for the Radius parameter, and a 5 levels value for the Threshold parameter. Click on the OK button. Hold down the < Ctrl > (<⌘>) and click on the copy of the red channel (it is called Red copy on the Channels panel) to load it as a selection.
Step 3 - Add Layer Mask
In the Layers panel click on the Create a New Layer to create a clean new layer. Now, while the selected area is still available on the display, click on the Add Layer Mask icon and you will get a mask of the layer, which is created on the basis of the selection. Look at the mask icon in the Layers panel. Usually it is just black or white until we start to paint it with a different color. But in this case, when the selection is active, the mask turned out similar to the red channel of the image. Another important caveat of this method is that we do not draw on the mask, but directly on the generated layer, and the mask helps to preserve the natural skin texture. Click on the layer icon in the Layers panel, to draw on a layer but not on the mask.

Step 4 - Skin gradually smooths
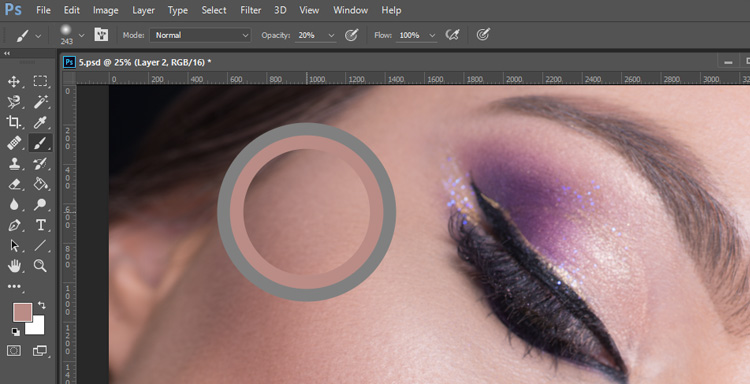
Activate the Brush tool and set the brush opacity option to 20%. Choose a large size brush with soft edges (100% opacity brushes can be chosen only by those users who uses graphic tablets and adjust the opacity of the brush strokes by varying the pressing force on the tablet). Hold down < Alt > (< Option >) and click on the piece of skin that you want to use to take a color sample of the fragment. Start to sketch the selected area, successively applying brush strokes of one another to amplify the effect. As you draw, the selected fragment of the skin gradually smooths out. The more brush strokes you apply to the image, the more skin smooths.
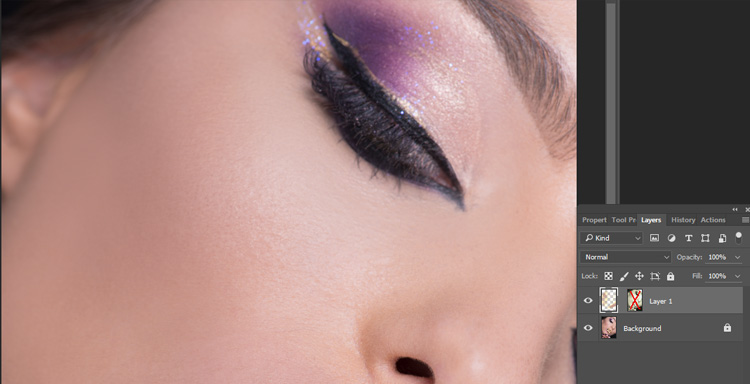
Step 5 - Evaluate mask affects
When performing this step, we will explain the principles of operation of this method. Will also explain why the skin of the model looks plastic in the picture to this step. Hold down < Shift > and click on the mask thumbnail. This allows you to hide the mask, and is indicated by the red cross, which crosses the mask thumbnail in the Layers panel. As now there is no mask, the skin looks plastic. You just picked the color and painted a picture with a solid color. And previously created layer mask keeps the texture of the skin. Hold down < Shift > and click on the mask thumbnail to enable it again. This action allows to evaluate how the mask affects the image. Having dealt with this issue, make sure that the layer mask is active (the mask thumbnail should not be crossed).
Since we painted on a separate layer, we can always adjust the expressiveness of the created effect by changing the opacity of the top layer.
Video tutorial